Saturday, May 19, 2012

Binding

The guitar with binding is pictured at left.  I mentioned that I wasn't happy with the way the binding went on my guitar, so perhaps a word or two of explanation.   I put it on in the standard way -- that is, I bent it to the shape of the guitar, and glued it in place using painter's tape as a clamping mechanism.   The channel cutter did a perfectly fine job of cutting the channel at a consistent depth around the guitar.  It's depth was shy of the thickness of the binding material (maple) or the binding material was proud of the guitar, and you can see the shavings where I scraped it down to be flush with the sides, soundboard, and back of the guitar.  All that works pretty much as advertised with a couple of exceptions.

Let me talk about the intersection of the back and the tail block.   Looking at it straight on, I think I did a reasonably good job of getting the two pieces of binding material to come together in a tight seam.  That too I did in the standard way.  I glued one piece of binding in place, then trimmed it back to the center of tail block inlay using a razor saw (cut at an angle) then a chisel.  The second piece of binding was glued in place up to the first, and I cut it away with the razor saw, then tweaked its fit carefully with a file.  I did the same on the soundboard side.  As I say, I am relatively happy with the way it came together.

 Looking at it from another angle, you can probably see the flaw that is annoying me.  I'm not entirely sure what I did wrong, but there was a gap that showed up between the back stripe and the binding.  I had cut the purfling channel not quite up to the back stripe, and then cut the binding channel.  I cleaned up the purfling channel to the back stripe with a chisel, and then glued the purfling in place.  I did the miters with an xacto knife.  The purfling was, or so I thought, flush with the binding channel, but when I removed the tape and scraped it flush with the back, there was a gap.  I filled it with epoxy and maple dust, but it is still visible.  Not completely happy with that.

There was another issue with the binding around the guitar.  I cut it too thick, and so I had difficulty getting it to set properly in the binding channel, and the tape didn't provide enough clamping pressure to keep it tight against the channel while I was doing the fitting.  Here again, I got a couple of gaps around the periphery of the guitar.  Again, I filled them epoxy and dust, but I can still see the gaps.  Not completely happy with that either.

My solution goes something like this.  Patience is a virtue, and one that I sometimes lack, but first, since I am cutting the channels with a rabbet bit and bearings, I should cut the channels for the purfling and the binding on the guitar body.  I can then use the channel itself to cut and finish the binding material to thickness.  I would still want it slightly proud of the channel to be scraped flush, but it would be considerably thinner, and the spring back after bending more amenable to adjustment with the tape's clamping pressure.

Sunday, May 13, 2012

Been Some Time

It's been some time since my last post, but life in Academe heats up over the latter part of April, first part of May -- all the celebrations leading to graduation.   I did fit the back and soundboard of the guitar, and glued it up.  You can see it in the photo at left. 

There are a couple of things I would do differently.  First, there is order of precedence.  I would glue up the back first.  It seems a well-duh! moment, but it's difficult to clean up squeeze out through the sound hole.  Second, I took the guitar out of the mold when I installed the end graft, and didn't put it back in.  I have had an idea for some time now to leave the guitar in the mold, and use violin clamps to glue up the back.  Once the shape has been determined, it can be removed from the mold to glue up the soundboard.  Third, I need to make a bevy of violin clamps.  It's possible to use various and sundry clamps, as I did, but the violin clamps would make it so much easier.

I did do some work on the binding channel.  I have pictured the binding jig in a previous post, but you can see it above, ready to use.  The guitar sits in the cradle, and the jig rides along the side as you cut the binding slot.  Some additional pictures are below to give some idea of the construction of the cradle and the jig.  Pretty simple stuff really.  The jig is essentially a drawer riding on metal full extension slides, which allows for up and down movement.  The hole at the top of the drawer is the "grip" for setting it down on the guitar.  NOTE:  do this carefully, particularly, on the soundboard.  Don't want to mar good work.

The router is attached to a plexiglass base that is inserted in the slot that you can see in the drawer toward the bottom.  It fits snugly for the moment, so I didn't put in a planned locking mechanism, but it would just be a set screw through a hardwood block above or below the slot.

In the photo at left, you can see the plexiglass base.  It is shaped to avoid touching the guitar except at very specific locations on the top and sides.  I use a rabbet bit, with a set of replaceable bearings.  There are other ways to do it, but I had the bit, so might as well use it.  I can get pretty close to the right depth, and I always make the binding a bit proud regardless, then scrape it down to final thickness after I've glued it up to the guitar.

The cradle is pretty straight forward as well.  It's just cut to the shape of the guitar, with the rests that you can see pictured below.

 As I said, I've cut the binding slots, and I did it by setting the guitar in the cradle, leveling it, and then running it around the edges of the guitar.  I'll talk a bit more about installing the purfling and binding in the next post, but I am running into some difficulties.


Monday, April 9, 2012

Finished Cradle

As promised, here are some photos of the finished cradle.   On the order of things I would do differently, if I had it all to do over again, I would extend the center of the basket to accommodate the hanger.  I am not happy with the mechanism that I made up.  It adds an element of fussiness to the design that wasn't necessary.  I'm finishing it with Tung Oil.  The cherry will darken over time, but in the meantime, it is au naturel in color.  It now awaits my grandson. 


Sunday, April 8, 2012

Cradle Progress

I have made some additional progress on the cradle.  I have assembled the stand.  The feet are a lamination of two pieces of Cherry.  The vertical piece is attached to the feet with a through mortise.  I cut the the mortise for the vertical piece prior to gluing it up, which simplified matters enormously.   The stretcher is actually a lamination as well.  I did not have a piece of sufficient width to run the required length, so I glued up two narrow pieces with a strip of walnut between.  When I cut the decorative channel in the stretcher, I centered it on the walnut.  If I had it to do over again, I might not cut the channel, but once cut, always cut.


The stretcher is also a through mortise.  That I cut on the drill press with a 3/8th inch forstner bit, and cleaned it up with a chisel.  You can see in the photo that it needs to be sanded flush, and cleaned up as well  The two narrow pieces that I glued up for the stretcher were not the same width, so the walnut strip was not centered in the piece, but when I cut the tenon, I centered the walnut strip in the mortise.  The walnut dowel pins are not necessary.  The through mortise would have given more than enough strength for that joint, and so the pins are purely decorative.


The hanging assembly for the basket will fit in the half circle on the vertical piece (the head stock).  You can see it in the photo below.  The "hangers" will be cut from walnut scrap, and will be pinned in place with dowels, that will complement the dowel pins on the feet.  I need to finish shaping the hangers, but they are a variant of "Molly's Cradle," the plans for which can be found with a quick web search.  Personally, I like my idea better, but others may have a different opinion.


I hope to finish it today, and will post details on the "hangers" when I have them all together and cleaned up.


Sunday, April 1, 2012

Progress on Cradle

I made a bit more progress on the cradle.  I finished the slats on the other side and laminated the feet and rough shaped them. 


I have partially shaped the spindles that will suspend the cradle, but I haven't quite decided yet what I want to do with them.  You can see in the photo above, the through mortise that will will hold the rail.  I'm going to laminate the rail from the cherry and some walnut.  I also bought a walnut dowel to do the pinning, so the walnut should offset the cherry.  It won't be as obvious as the cherry ages, but it will look sharp initially. 


For reasons that ought to be obvious, I want the head of the spindle to look a bit like the headstock of a guitar.  I am thinking of putting dowel pins along the "headstock" to suggest tuning pegs, but we'll see.  It might be altogether too cute.  At any rate, hope to finish it next weekend.


Monday, March 26, 2012

Cradle

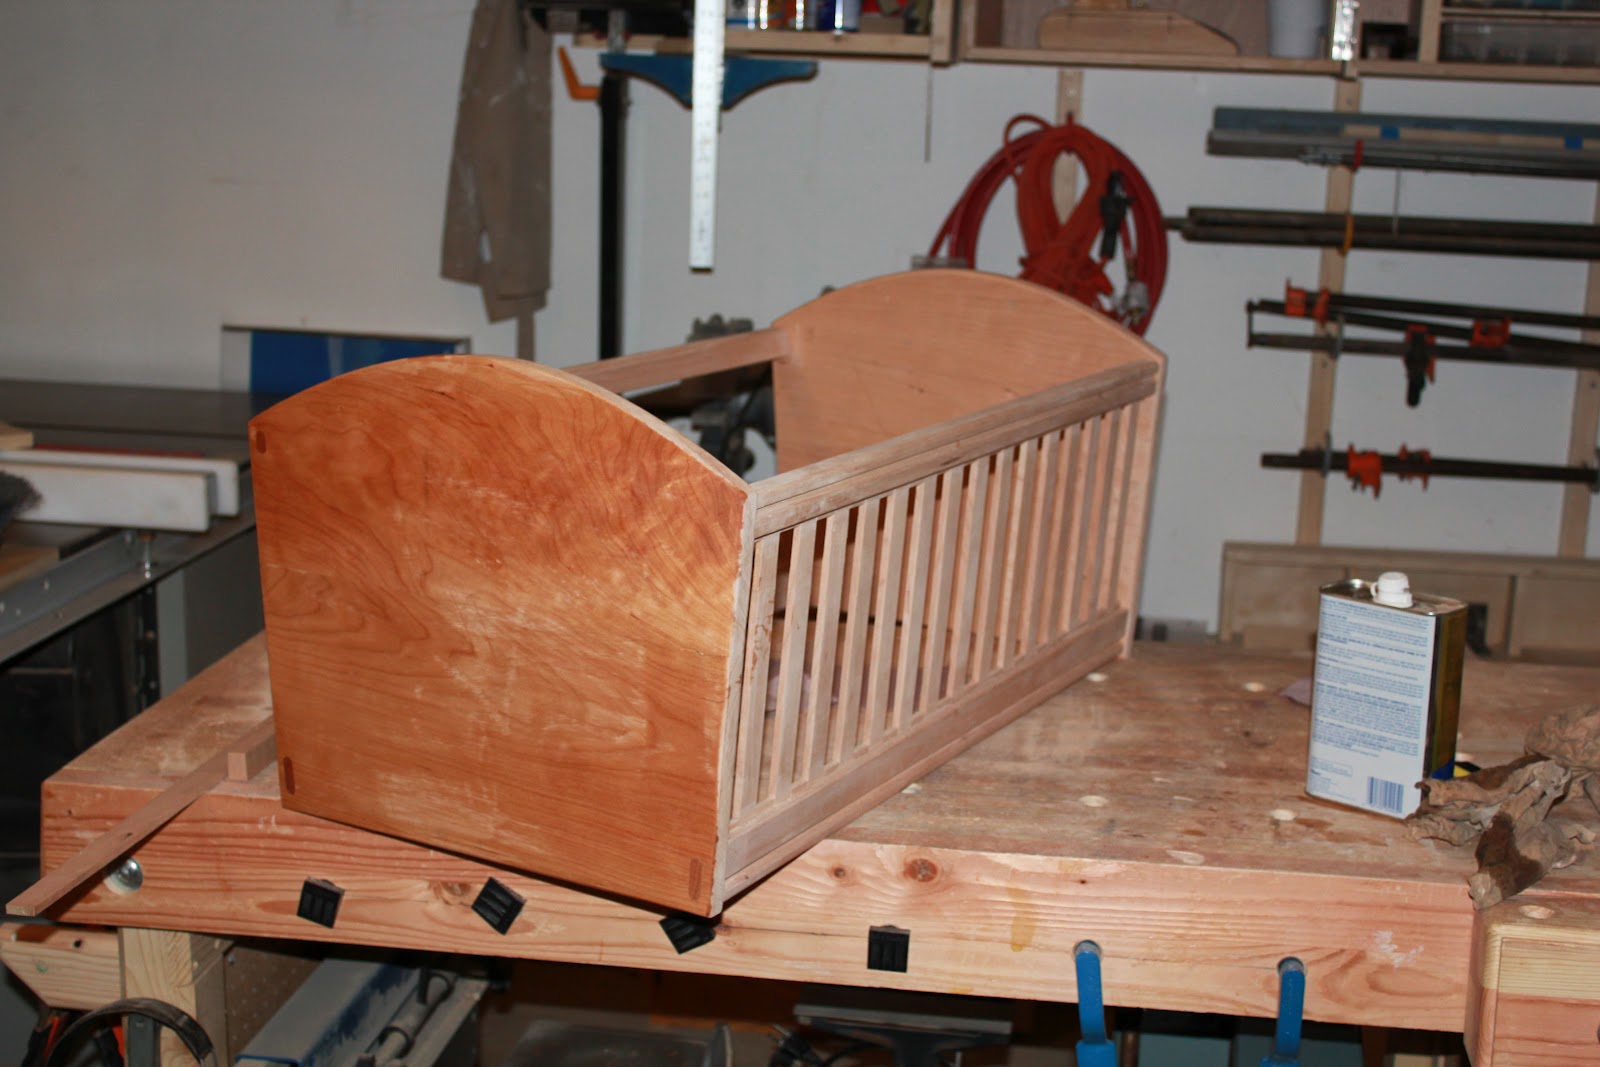
As promised, here is a photo of the cradle in progress that I promised for my new grandchild.  I decided to make it from Cherry.  I still haven't decided how I want to finish it.  I would like to leave it alone.  There is plenty of sun shine in LA where it will find its eventual home so it will darken with age naturally and that appeals to me, but since I'm making for my son and his wife, I should probably ask them. 

As I mentioned the design is fairly simple.  I wiped it with mineral spirits so you can see the through mortise and tenon joinery that attaches the rails to the end pieces.  (Disregard the plane marks.  I will sand them away, then finish it off it a card scraper for the sheen.)  I cut the mortises on the drill press with a 3/8 inch forstner bit, and cleaned them up with a chisel.  As you can see, I did not square the ends of the mortises, but rather rounded the ends of the tenons.  That's more an aesthetic decision.  I like the rounded ends.

 I glued up the end pieces with the rails before installing the slats.  I stood and stared at it for some time, then tried it with a dry fit, and it worked fine.    The rails have a 1/4 inch groove cut along the length of the that hold the slats.  The slats themselves were cut from scraps left from the rails and the end pieces.  They should be slightly proud of the 1/4 inch, so one can plane away the saw marks, and adjust for a snug fit (though not too snug or they are difficult to fit into the groove).  I put all the slats in place, then starting in the middle, I put 1 inch spacers between each slap, except at the ends, where a bit of adjustment on the length of the spacer was needed.  The spacers between the slats stand about 1/8 inch proud of the groove, so they add a shadow line.  The spacers themselves are glued in place, with a generous bead of glue along the bottom of each one.  Since the slats are not structural, the hidden squeeze out from the spacers is enough to hold the slats in place.   I will finish the other side with off cuts from the stand.   

Saturday, March 24, 2012

Kerfing & Cradle

I have made some progress on the guitar, but not as much as I would hope.  I traveled to Denver last week end to attend to family business, but I have installed the kerfing.  My jig for making the kerfing is multi-purpose -- basically my cross cut sled for my table saw.

The saw sled has an auxiliary fence clamped to it with a brad nail driven into the bottom.  You can see that the brad is about 1/4 inch from the saw kerf, and the depth of cut is set just shy of the 1/4 inch thickness of the kerfing strips.  I cut the strips on my band saw (now working!) and run a plane over them to remove the saw marks.  One set of two strips, for the back, is cut from walnut, the other set is cut from redwood, for the soundboard.  For the first cut, I push the strip up against the brad, make the cut, adjust the depth and cut and run it over the blade again if necessary, then set the kerf over the brad, make the second cut, and so on.  It's tedious, but it works.

When I've cut the strip, I run a plane over the back until it is paper thin, then do a test fit, cut it to length, and glue it into place with a whole bunch of spring clamps.  When I glue it in place, I leave it slightly proud of the side, and level it down after the glue has dried.  It looks like this when its finished.  I'll do some additional leveling when I'm ready to install the back and sound board. 


In the meantime, I have started on another project.  My youngest son has commissioned me to make a cradle for my newest grandchild due in April.  I've opted for a rather simple design, so I will let it emerge as I go along.  Today, I succeeded in purchasing the wood (cherry) and gluing up the end pieces. 

While the glue was drying, I cut the four rails for the sides, and the slats that will go into one of the sides.  I have a trick for installing the slats.  I cut a 1/4 inch slot with my dado blade along the length of the rails.  The slats are set apart by spacers in the slot, so they are perfectly spaced, the spacers provide an attractive shadow line, and so all is good.  Unfortunately, I came up a little short on the amount of wood I bought today, so I only have enough for one set of slats, for one side, but you can see rail design, and the slats.  I hope to finish the ends, and one side tomorrow, so I'll have more pictures.